
In this article, I will be teaching you everything you need to know about How to Set up a blog on Showit. The design aspect of your Showit website template, the connection between Showit and WordPress, and how to create your very first blog post in WordPress.
If you don’t already know, WordPress is the ultimate blogging platform. Showit works together with WordPress to allow creative freedom that you experience with the rest of your Showit website. Unlike, the rest of your Showit pages, with your blog, you design in Showit and write blog posts in WordPress.
If you already have a blog, Showit can easily migrate your current blog.
Content
- Set up Your WordPress Account
- Logging into WordPress
- Linking Your WordPress Content to Showit Blog Home Page
- Linking the ‘Read More’ Button to a Blog Post
- Understanding Your Showit Blog Articles Grid
- How to Change Blog Post URL to Post Title
- Creating a Blog Post
- Scheduling a Blog Post
- Setting up Blog Post Comments Section
- Creating a Blog Post Info Sidebar
- Creating Blog Categories
- Making a Blog 404 page
![]()
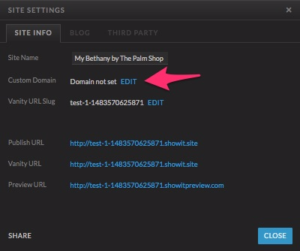
Setting up Your Domain
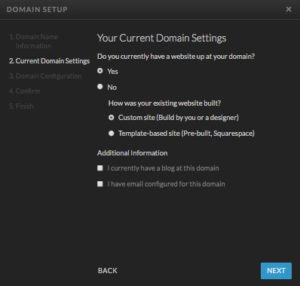
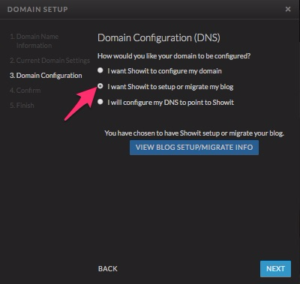
Before anything else, you’ll need to link your current domain or request a new one by clicking on ‘Site Settings’ located on the top left of your Showit Backend. Next to ‘Custom Domain’ click edit which will then take you to a set of steps to follow. Check the boxes that apply to you and follow the prompts. Then finally at the end, check the box ‘I want Showit to set up or migrate my blog’ then click Done.
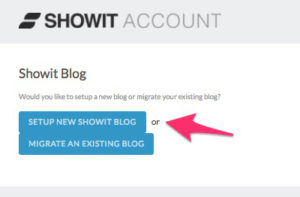
Once the box has closed, click on your name located on the bottom left of your Showit backend and click on ‘View User Profile’. Here it will say ‘Set Up Showit Blog’. You’ll be asked to set up a new blog or simply migrate your current one. You’ll then be asked to fill out a form and the Showit team will either set up a new one or migrate your existing one. This will take between 2-4 business days to complete, once it’s ready you’ll receive an email to proceed.
 .
. 
 .
. 
 .
. 
![]()
Logging Into WordPress
You can now log into your WordPress backend by typing in this URL. Use your domain name followed by /wp-admin. Eg. www.domain.com/wp-admin
Then log in to WordPress by using the same log-in details as your Showit account.
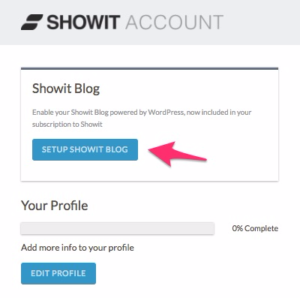
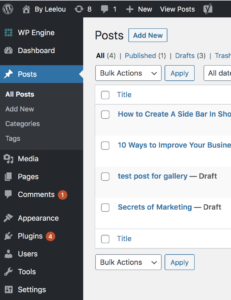
On the right-hand side of your WordPress backend, you’ll find the tab that says ‘Posts’. This is where you’ll be writing and publishing your blog posts. Where it says, ‘Add New’, this is where you can create a new blog post.
![]()
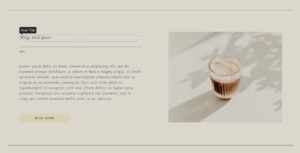
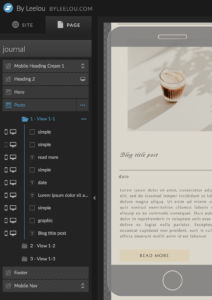
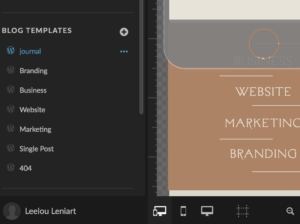
Showit Blog Landing Page
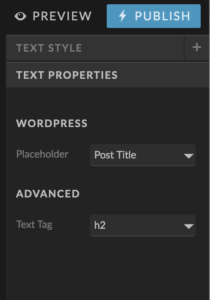
The title, blog content, categories, and feature image are what is linked to your Showit pages. If you refer back to your Showit Blog landing page, you’ll see that there is a section showing a blog post. The text boxes are not regular text boxes, they are WordPress placeholders. If you click on them, a small black box will appear at the top. The tab called ‘Text Properties’ on the right of your Showit backend will contain the WordPress placeholder’s drop-down menu. This is how Showit speaks to WordPress.
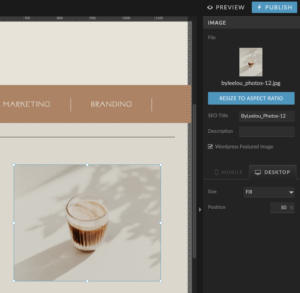
As for the image located next to the blog post on the blog landing page, this is pulled from the feature image in WordPress. If you click on the image in Showit, the tab called ‘Image’ on the right will have a checkbox that says, ‘WordPress Featured Image’. This should be ticked so that the feature image place in WordPress will appear.
![]()
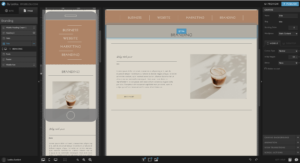
VIEWS
On your bog landing page, you’ll only be able to physically see one blog post design. This is because they are all located in different views and each view is a blog post featured on your blog landing page. This is created so that Showit and WordPress can speak to each other and connect each blog post.
The views are located underneath the canvas containing your blog posts.
You might have between 6-10 views located on your website template. Click on one of the views and underneath the tab called ‘canvas’ located on the right-hand side, you’ll see that the checkbox that says ‘Combine Views as Posts’, ensures that is ticked. There will also be a drop-down menu called ‘WordPress’ which should be on ‘In Post Loop’.
These settings allow the blog posts to begin looping when you post through WordPress. Each view is now to set to loop together continuously creating a flowing design.
Once you click on publish and view your website live, only then will you be able to see the posts in action.
 .
. 
![]()
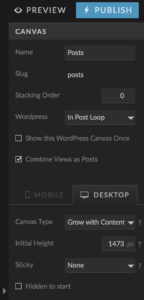
CANVAS SIZE
The canvas size settings you apply onto your blog post canvases are really important as you want to ensure the canvas grows with the number of blog posts you have.
To do this, click on the canvas background than on the ‘Canvas’ tab located on the right-hand side settings. The ‘Canvas Type’ drop-down menu should be on ‘Grow with Content’.
This will ensure that your canvas will grow with the number of blog posts you publish. Also, click on the Mobile tab and do the same thing.
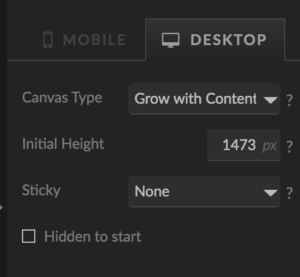
*Changes you make on the Desktop view should also be made on the Mobile view.
![]()
Single Blog Post Page
This is the page where you design how your blog post will look in full.
Firstly, in your WordPress back end head to settings > permalinks and ensure the ‘Post Name’ has been clicked. This allows the single post URL to appear with the title name rather than other details.
On your Showit single blog post page, you will find the following WordPress Placeholders:
- Blog Post Title
- Blog Post Date (Will be pulled from the original published date)
- Blog Post Category (Located on the right, this is where you can assign a category you have previously created or simply create a new one by clicking on ‘Add New Category’)
- Blog Post Content
- Blog Post Image (Featured Image)
- Blog Post Comment Form (Will appear once published)
- Blog Post Existing Comments (Will need to be approved before appearing on your website)
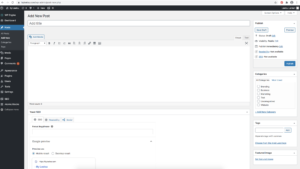
In your WordPress backend, after clicking on ‘Add New’ this is where you’ll be writing up your complete blog posts. Once published to your website, all the place holders in Showit will now be able to pull the information from your blog post in WordPress.
![]()
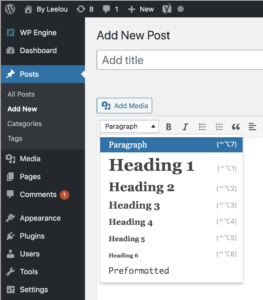
HEADINGS
As you’re writing up your blog post in WordPress, you will find a drop-down menu above the blog content called ‘Paragraph’. In here you will find a range of different headings. The first 3 Headings will be pulled from the headings you have created in your Showit design settings.
These are the exact headings that will appear:
Showit: Title = WordPress: Heading 1
Showit: Heading = WordPress: Heading 2
Showit: Subheading = WordPress: Heading 3
Showit: Paragraph = WordPress: Paragraph
![]()
ADD MEDIA
There is a button located at the top called ‘Add Media’. Here you can add images, videos, and even a gallery. Simply click on ‘Upload Files’ and add in your media. Then click on the media you will like to add.
Always make sure you adjust the size of your images using the squares on the corners of the image. You can also align the images to the left, right, or center of the page.
![]()
PREVIEW
If you would like to view your blog post before pressing publish, you can do so by clicking on ‘Preview’ located on the top right-hand side.
![]()
PUBLISH
Once you feel that your blog post is ready you can now click on ‘Publish’ located underneath ‘Preview’.
The blog post should automatically appear on your website but in some cases, if it’s not appearing, then I recommend pressing publish through your Showit backend.
![]()
BLOG COMMENTS
There are 2 sections for comments located below the blog content in Showit. These sections have been designed to allow readers to comment and view existing comments.
The text boxes are WordPress place holders and will not be visible until published and viewed live.
![]()
Categories
You don’t have to have categories in your blog; however, it makes it easier for navigation purposes if you have a range of posts.
On your blog landing page, you will see a number of categories. To allow these buttons to work you will need to apply a click action with a specific URL.
To add a link, click on a text box that you would like to assign a category to then underneath the ‘Click Actions’ tab on the right you will need to choose URL in the drop-down menu. The URL will be your domain name eg. www.studioleelou.com followed by /category/the category name. (eg. Business) The full URL will look similar to this: www.studioleelou.com/category/business
If you’re unsure what the name of your categories are, simply head to WordPress and click on Posts > Categories. You’ll find all of your previously created categories there. Under the ‘slug’, you’ll find the exact wording you’ll need for the URL.
You’ll need to add those URL’s to each category title until they have all been linked. Once that’s done, all your blog posts with allocated categories will be sorted under each title, allowing your audience to easily locate them.
![]()
SEPERATE CATEGORY PAGES
You can create separate category pages to appear when you click on a category on your blog landing page. This is if you would like a different image or/and a header to appear when viewing the categories.
You should only do this next step after you’ve finished linking the categories on your blog landing page.
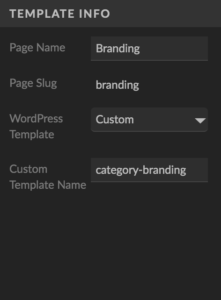
To create a separate category page, simply duplicate the blog landing page by clicking on the three dots next to the page and click on ‘Duplicate’. Then rename it the category title. Ensure you are clicked on the page tab then underneath the tab called ‘Template Info’ on the right enter the following settings:
Page Name: Category Title
WordPress Template: Custom
Custom Template Name: category-name (eg. category-business)
Now you are ready to insert a blank canvas into that page and rename the page the category title. You will then need to move the new canvas underneath the category heading by dragging the canvas on the left. Then add a text box and type in the category title of the page. This is when you can also change the hero image located at the top to represent each category.
Once the new page has been modified, you can now duplicate the page to complete the rest of the category pages. You will need to change the page name, template info, title, and image on all duplicate pages.
![]()
404 Blog Page
The last thing I’d like to mention is the 404 page. You’ll need to create this page for when a user lands on a dud link or manually types in a link that doesn’t exist in your blog.
I have simply created mine by duplicating the blog landing page and then deleting the areas I don’t need, such as the blog posts and category canvases. I’ve then modified the text to say, ‘oops we can’t seem to find what you’re looking for’. I’ve also left the search bar to allow the users to navigate back to the blog posts.
Then change the page name to ‘404’ and on the tab called ‘Template Info’ on the right enter the following settings:
Page Name: 404
WordPress Template: 404
Yay you made it to the end of this extremely long and detailed blog post.. about blogging 🙂
I believe I’ve covered everything you need to know about the blog and how Showit and WordPress work together. If you need further guidance head to https://learn.showit.co/en/ where you’ll find a large range of articles and tutorials on Showit.
Or, you can watch our video tutorial on this exact post with demonstrations shown via our Showit and WordPress back end. https://youtu.be/zMqByYLNH6U
Want to see our beautifully designed Showit templates? Click Here

AUTHOR:
Leelou Leniart

This article was written by me Leelou. I have gained my knowledge of the wedding industry first hand through photographing weddings for over 8 years. With a Bachelor in Communication Design, I now use my photography experience to create brands, websites and digital resources for wedding photographers and videographers.
SHARE:
Leave a Comment